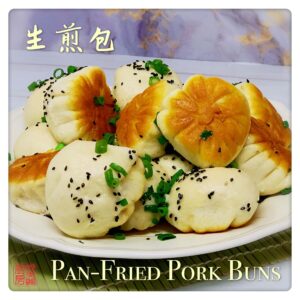
Pan-fried Pork Buns 生煎包
Pan-fried pork buns or 生煎包 (shēng jīan bāo) is a Shanghai snack food, commonly paired with tea, that is around 100 years old. Now, you can eat it for breakfast lunch, dinner or snack all over China. This dish can be found in most restaurants that serve Shanghai cuisine.This recipe will show you how to make fluffy, airy and crispy buns with a flavourful soupy filling that is going to impress everyone. This might seem pretty bold, but I really think that my pan-fried pork buns are better than the ones you find at most restaurants!
Approximate cost (CAD) $9
Ingredients
Ingredients for bun:
- 500 g All-purpose flour (3c+3tbsp)
- 2 g Baking powder (3/8 tsp)
- 225 ml Milk
- 75 ml Hot water
- 6 g Yeast (1 ¾ tsp)
- 6 g Sugar (1 ¼ tsp)
Ingredients for broth gelatin
- 300 ml Broth (chicken or pork)
- 1 packet Gelatin powder (7 g)
- ½ tsp Salt (do not add if your broth contains salt)
* Alternative to using gelatin powder: Take 150g of pig skin, blanche for 5 minutes. Scrape off excess fat; cut into strips; add to 300ml of broth and 300 ml water; add ½ tsp salt (do not add if your broth already contains salt); and bring to a boil. Turn heat down to low and cook for 2 hours. Strain and pour 300 ml into a container; let cool and then put in the fridge for setting. It takes approx. 2 hours to set. Best to make the day before.
Ingredients for meat filling:
- 500 g Ground pork (traditionally comprised of 70% lean and 30% fat)
- 2-3 stalks Green onions
- 1 tsp Salt
- 1 tsp Sugar
- 1 tsp Light soy sauce
- 1 tsp Dark soy sauce
- 1 tsp Shaoxing wine
- 1 tsp Oyster sauce
- ½ tsp White pepper powder
- 1 tbsp Ginger , finely chopped (optional)
- 1 tbsp Sesame oil
- 1 tbsp Black sesame
Instructions
Instructions for Dough Part 1:
- Add 2g or 3/8 tsp baking powder to 500g of flour in a mixing bowl, mix well
- Add 75 ml of hot water to 225 ml of milk
- Add 6g (1 ¾ tsp) of yeast and 6g (1 ¼ tsp) of sugar to the milk mixture, wait 5 minutes, stir and add to flour mixture while mixing
- Mix with spatula until liquid is fully absorbed
- Knead the dough until it is not crumbly and form into a ball
You can also use your mixer with the dough hook and mix for 5 minutes on low speed or until the dough is smooth; then you can skip steps 6 and 7 - Place dough into a bowl and cover for 15 minutes
The dough will get softer making it easier to knead with your hands - Knead the dough again for 5-10 minutes. Form a ball and cover
My ball of dough rarely looks smooth but it doesn’t seem to matter for this recipe. After proofing, it will look smoother - Place dough in bowl and cover for 1-2 hours to proof, or until dough doubles in size
Instructions for broth gelatin:
- On the night before, prepare the broth gelatin by heating 150g broth in a pot. When it comes to a boil, lower the temperature to low, add 1 packet (7g) of gelatin, ½ tsp salt (do not add if your broth already contains salt) and mix well until the gelatin has melted. Pour the mixture through a sieve into a bowl and add the remainder 150g of the broth and mix well. Wait for mixture to cool, cover the bowl and put in the fridge to set overnight.
You can also add aromatics like ginger, star anise, bay leaves….into the broth and let it simmer for 30 minutes before removing the solids and then add the gelatin - On the day of making the dumplings, chop up broth gelatin into little pieces (roughly 5mm)
- Put into fridge until ready to use
Instructions for Meat Filling:
- Chop green onions, save 2 tablespoons of it for sprinkling on top of buns
- Put 500g of ground pork into a mixing bowl
- Add 1 tsp salt, 1 tsp sugar, 1 tsp light soy sauce, 1 tsp dark soy sauce, 1 tsp Shaoxing wine, 1 tsp oyster sauce, ½ tsp white pepper powder, 1 tbsp finely chopped ginger (optional) to the meat
- Mix the meat mixture well. Mix in one circular direction to create a somewhat sticky meat mixture for about 1 minute.
- Add the chopped gelatin broth and the green onions (remember to save 2 tbsps for the end) to the meat mixture. Mix well while continuing to stir in the same circular direction.
- Once meat mixture is well mixed, add 1 tbsp sesame oil to lock in the moisture and flavour of the meat, and mix well.
- Cover and put meat mixture in refrigerator until ready to be used
Instructions for Dough Part 2:
- Once dough has doubled in size, remove from the bowl and knead, pressing out the air. Knead for 3-5 minutes and shape into a ball. Cut dough in half, placing one half back into the bowl and cover
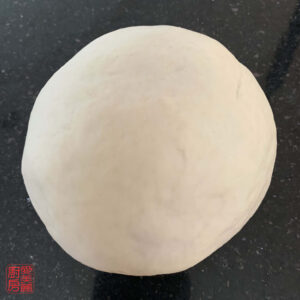
- Shape the other half into a ball and flatten slightly. Find the centre point and make a hole in it with your fingers to make a ring
- Rub, twist and stretch the dough ring until the dough is approx. 4cm in diameter. Try to make the diameter of the dough as even as possible around the ring. Cut open the ring so you now have a log-shaped piece of dough
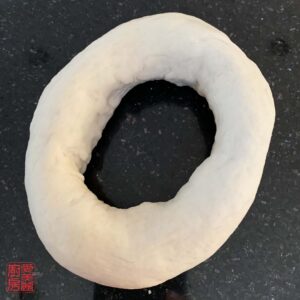
- Cut into approx. 26g pieces, shape each piece into a circle shape and press down with your palm. Place the pressed pieces under plastic wrap or in a bag to prevent drying
Instructions for Wrapping:
- Prepare a non-stick fry pan by adding 3 tbsp of oil to it and spread it around
I can fit 15-17 buns in my 10” fry pan - Pour 1 tbsp of oil in a small container Used to brush oil onto the sides of the buns to prevent them from sticking to each other
- Roll each piece of already pressed dough to 9-10mm in diameter, rolling the edges thinner than the middle
- Each bun should have approximately 26 g of filling
- Put filling in the center of a dough skin
- You can rest the wrapper on the table and use both hands to help with folding pleats on the edge of the wrapper. Alternatively, you can hold the bottom of the bun on the palm of one hand, folding the pleats with your fingers on the other hand
- Each fold is approximately ½ cm wide. After each fold, squeeze the pleats together to bind.
- Keep folding until there opening is a small hole and seal the hole by pressing the sides of the wrappers together.
- If frying pleat side down, you can fold over the little piece of dough stem at the end. If frying pleat side up, you can remove the stem but make sure your bun is fully sealed.
I prefer putting the pleat side down because it will fuse the closing together more effectively which will have less risk of leakage - Put the finished bun into the oiled fry pan and brush oil onto the sides of the bun
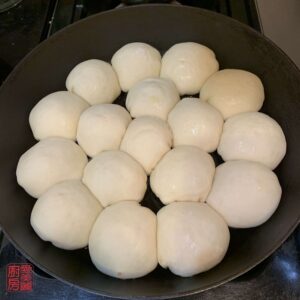
- Continue wrapping the buns until you fill the pan
buns can be touching each other but not pressed together. This way, the buns will rise vertically. If there is too much space between the buns, the buns will rise horizontally and may look more flat
Instructions for Frying:
- Put the pan on the stove and turn on heat to medium
- When you can hear some sizzling, add water until the water level is approx. 5mm. Cover with lid and cook for 10 minutes until the bottom of the buns are a golden colour. Turn off heat
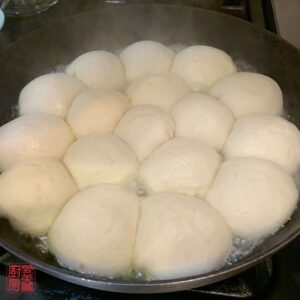
- Sprinkle with black sesame seeds and the leftover green onions, cover for another minute.
- Remove the buns from the pan and serve with Chinese spiced vinegar or Chinese red vinegar with thinly shredded ginger
- Remind everyone to be careful of the hot soup inside the bun